
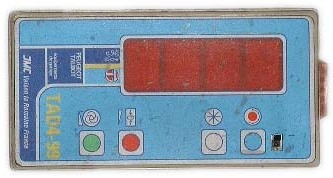
TAD 4-99 tester
This page contains operating instructions for the Peugeot TAD 4-99 diagnostic tester, in relation to the Peugeot 205 Si.1
| TAD 4-99 APPLICATION CHART | |
|---|---|
| Model | 205 SI |
| System | INJ/IGN |
| Connector Colour | Green |
| F1 ReadingErasing Fault Codes | YES |
| F2 Actuator Test | YES |
| F4 Advance Adjustment | YES |
CONNECTING THE TESTER
- Ensure that the slider switch is in position 1
- Connect the red and black clips respectively to the + and - battery terminals.
- Connect the black 2 pin socket to the diagnostic connector.
- "F1" must be displayed in the top screen, if not, disconnect and repeat the procedure.
- Press on the Blue Button to scroll through the four functions
FUNCTION NUMBERS
- F1 Autodiagnostic Tester - Reading/Erasing fault codes.
- F2 Actuator Test - enables operation of certain components controlled by the control Unit.
- F3 Mixture adjustment (not used in Australia)
- F4 Ignition adjustment - enables timing adjustment on Magneti Marelli Engine Management Systems.
When the desired function number is displayed confirm your choice by pressing the White Button.
F1 - AUTODIAGNOSTIC TEST
This function allows the operator to read and erase the control unit memory
Reading the memory
- Carry out the connection procedure - Select "F1"
- "C1" appears: - turn the ignition on within 7 seconds.
- Wait for "00" to be displayed.
- Press the Green Button until the upper right dot of the top display has lit.
The fault codes are displayed vertically, starting with the "12" indicating the start of test and finishing with "11" indicating the end of the test.
Note: Once the Green Button has been pressed and released no other action is required on the TAD 4-99. Wait until the code "11" is displayed to indicate the end of sequence.
If more than 4 fault codes are received by the tester, the centre point of the last display panel lights up to indicate that there are more codes. To view these codes press on the Green Button.
Erasing the memory
To erase the control unit memory you must first read the memory and wait for code "11" (end of test sequence) to be displayed.
- Hold the red button down until "EF" is displayed. (3 seconds)
- "EF" will be displayed throughout the entire period of clearing. Once clearing is finished, the display indicates "00". - you must wait for "00" to be displayed before disconnection.
- Read the memory again. If clearing has been effective, the only codes to appear should be "12" and "11".
- After clearing the control unit memory it may need to be re-initialised.
F2 ACTUATOR TEST
This function allows the operator to operate certain components controlled by the Control Unit.
Actuator Test
- Carry out the connection procedure. Select "F2"
- "C -" is displayed:- You have 7 seconds to ensure that the ignition is OFF.
- "C1" is displayed:- You have 7 seconds to ensure that the ignition is ON.
- "- -" is displayed:- after a few seconds the first actuator will operate and the actuator code will be displayed.
- To move to the next actuator depress the Green Button for 3 seconds.
- After a few seconds the next actuator will operate.
- To end the test turn off the ignition.
Important: When operating the injectors through the actuator test, fuel is being sprayed into the inlet manifold. Do not perform this operation for any longer than 15 seconds.
F4 IGNITION ADJUSTMENT
This allows the operator to carry out a timing adjustment on the Magneti Marelli engine managemant systems.
Ignition adjustment
- Carry out the connection procedure. Select "F4"
- "C -" is displayed: you have 7 seconds to turn the ignition OFF.
- "C1" is displayed: you have 7 seconds to turn the ignition ON.
- After a short period, "- -" should appear, then code "22" will be displayed.
- The system is now ready to accept an ignition adjustment.
- Press the Red Button, one of the following numbers should appear:
(19, 11, 12, 13, 14, 99) - To adjust, depress either the Red Button (retard) or the Green Button (advance) until the required setting code is displayed.
Note: Hold buttons down for at least 3 seconds. - To memorise the required ignition setting code, depress the White Button and hold for 6 seconds.
- Without pressing any further buttons wait for code "11" to appear. This is the validation code from the ECU to the TAD 4-99.
Note: It is important to wait until code "11" appears. If TAD 4-99 is disconnected prior to this, the modification may not be memorised.
| Timing Codes | |
|---|---|
| 19 | 0° retard (original factory setting) |
| 11 | 2° retard |
| 12 | 4° retard |
| 13 | 6° retard |
| 14 | 8° retard |
| 99 | 0° end of range (limit stop) |